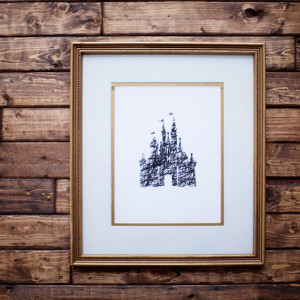
So, we may or may not be obsessed with Disney, and on my quest to create a cozy home I wanted to make sure it also reflected us, and what we love, but we’re not interested in cartoony, cheesy Disney decor. We want to show our love for all things Disney, but keep it classy. I know, you’re probably thinking, “Is that even possible”? Well, you’re about to find out.
One night, while I was piecing together a gallery wall, my sister joked, “You should totally make a huge Mickey head using nails and twine”.
She only thought she was joking, because, without hesitation, I said, “That’s genius. I’m totally doing it”. What was there to be afraid of? So, I try to make a Mickey head with 20 nails on the wall, and it looks horrible. I pull out the nails and hang something else. No big deal.
I dropped everything and began creating a string Mickey head for our wall. I absolutely adore it, and it never fails as a conversation starter.
Here’s how you can create your own
Mickey Head String Art Wall Decor
Supplies you’ll need:
- Mickey head template (See below how to make it)
- Nails, we used 26
- Hammer
- Twine
1. Make Mickey Template
I Googled ‘Mickey silhouette’, downloaded an image to my computer and zoomed way, way in. At first, I taped four sheets of paper together, (if you have white wrapping paper, then it will be easier), but it was too small so we tried again with eight pages, creating a 20×24 inch template.
2. Attach Template to Wall
I decided to hammer the nails straight through the paper. I started with all the major points and then filled in the nails paying attention to keep the nails spaced evenly. I used 26 nails. I used nails that were long enough to have twine wrapped around it several times.
This wasn’t big enough, so I made it bigger because bigger is always better.
When you get all the nails in, just pull off the paper template.
3. Wrap the Mickey
This is the fun part. Tie a knot on a nail, and start wrapping. Pay attention to make sure you don’t cross over the same path, and be sure to outline Mickey’s head so he is defined! You can make it as thick or thin as you desire. When you’re happy with the way he looks, then tie off the twine.
We did try Mickey first with brown twine but didn’t think he was Disney or Mickey enough, so we switched to the black twine, but maybe you’d like a more subtle Mickey. It’s totally up to you!
UPDATE: We moved to Florida, so now Mickey is on the wall of our new house! 🙂
And to all my Disney lovers, wanna give it a try? Let me know when you do, I’d love to see how it turns out. You can tag me on Instagram, Twitter, or Facebook.
Fill out the form and we’ll email your link for the Mickey Head template!


Thank you so much. I can not wait to do this.
This is just what I was looking for! You’re BRILLIANT!!!
Thank you so much I cannot wait add Mickey to our wall!
Oh my goodness, that’s so cute. Thank you so much for sharing